Having been promised that I would have the tech spec to go with the drawing by mid August imagine my frustration to get back from my hols mid September to find still no tech spec. Will I ever get my garage built!
Author: StephenWeblin
-
Mending the VDO Kienzle Clock
I found this on VW Samba forum via a link on an Irish Triumph car site.
How To Fix The VDO Kienzle Clock, By Erik Acs
Read all of this prior to starting:
-Once the clock is removed from the car you must remove the chrome trim
ring. The trim ring houses the faux glass clock cover, so be careful not
to crack the plastic! I would suggest studying the ring so you are
familiar with how it mounts to the housing. Hold the base of the clock
and turn the ring; this will help loosen it a little. The part of the
chrome that wraps around the base of the clock, the portion facing the
dash cannot be seen when the clock is in the car, this is the area I pry
about a 1 inch area of the chrome lip up using a small (eye glasses
type) screwdriver.-Put the base of the clock in a vice and tighten it just enough to make
it temporarily ovalize. At this point you should be able to pop the
chrome off (this is the hardest part of the entire procedure).-Once the ring is removed, turn the clock over and remove the three
small nuts with a slot screwdriver or pliers. There may be some green
paint, or a plastic piece on these nuts, just scrape it off. Once this
is removed push the clock out of the housing using the electrical
contact. At this point, you should have six washers, three that go
inside and three that go under the nuts, put them aside.-Inside you will find a series of gears and a coil and a couple of
springs. There is a steel disk about _ inch in diameter near the rear
end of the clock which has an electrical contact mounted under it. When
this electrical contact is closed, current is sent to the coil, which
spins the steel disk around about _ turn. This is how the clock is
wound. The disk is spring-loaded and will slowly over the course of
about 2 minutes return to its original position – operating the clock as
it goes around. When the contacts close, the process starts all over
again. For this reason, this clock only uses power for a fraction of a
second every 2 minutes. You can turn the disk manually and see how this
all works. The rest of clock works like a regular clock with all of the
gears, etc.-These clocks have a built-in fuse, which is normally the cause of the
clock not working. Right next to the coil is a set of metal tabs, which
should be soldered together. With the clock facing you, 12 at the top,
the tabs are located at the top of the clock against the back piece of
circuit board material. It is a little copper piece of metal with a hole
in it. This connects to the top of the coil. It works like a spring,
when the solder melts it pops to the back of the clock disabling power
to the coil. If your clock is not working, chances are that these two
tabs are no longer soldered. The process to repair it is simple:
re-solder the connection. To do this correctly, you need to use a low
temperature solder (solder with a fusing point of 120C or 248F). Using
regular solder is an option that will work fine, but someday your clock
will really get fried because the tab fuse didn’t melt like it was
supposed to. When you solder the two tabs together, be sure that the top
tab is pulled down (so it is spring loaded) to meet the other tab and
then soldered. Don’t try to bridge the large gap because this spring
loading is what helps to separate the tabs when the fuse melts.-I used regular solder and am currently in the process of assembling an
in-line fuse, which is external to the clock, making it easier to
replace in the future.-Well, that’s about it! Spray the entire clock mechanism with wd40
(chances are it is seized up from not moving). Clean out the black dust
inside the housing, pop the clock back in (don’t forget the washers) and
pop the chrome on. With a small hammer and punch you can bend the
chrome lip back. Adjustment of the clock speed is made by the small
brass slot screw, which protrudes through the rear cover.
Counter-clockwise goes faster, it seems each 1/8 of a turn affects the
clock by about 5 minutes per day.-If this doesn’t fix your clock there is a possibility that the coil or
the resistor is burned out. These clocks are pretty rugged and generally
the mechanism (gears & springs) will not wear out. If you want to
test the clock outside the car, find a low amperage 12volt power source
(4-6 amps). The electrical contact on the rear is the positive and the
housing of the clock is negative. When you apply power the wheel will
wind and ticking can be heard. -
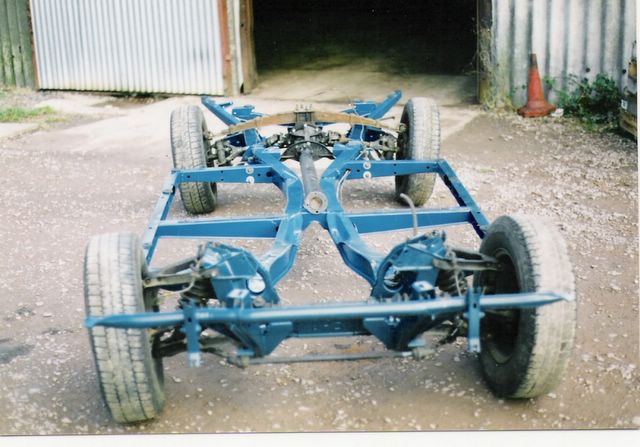
Bare chassis outside Canley Classics

Bare chassis outside Canley ClassicsThought I would try a photohosting site out. It seems to work!